Showing posts with label Google. Show all posts

Google Street View App with Google Cardboard

Google expeditions is a great way for students to visit locations around the world. Unfortunately, the kits can be expensive. A great less expensive alternative is to purchase a couple Google Cardboard viewers or any other virtual reality headset and use the free Google Street View app. (iOS and Android versions available). 

While you can't control the locations, you are still providing a unique and rich experience for the students. And for a lot less money. 

Follow these steps to create a virtual reality field trip:

  1. Using a cell phone, open up the Google Street View app
  2. Search for a location
  3. Click on one of the blue circles around the selected location
  4. Click cardboard icon on the top right of the image
  5. Place the device in the headset
  6. Put the headset up to your eyes and turn around 360 degrees to enjoy the location as you are there. 


Chrome Tip for Pasting Text into Google

This is a great Chrome tip for anyone that does a lot of copying and pasting into Google tools. Copy text from another resource and use Shift + Command/Control + V to paste the text. The pasted text will appear in the same font and size as the Google document, slide, spreadsheet, sites, blogger, etc. No more need to paste the text and then reformat. Please note that this doesn't work with hyperlinks because when you paste the hyperlink disappears. 


SHIFT + COMMAND/CONTROL + V


Design Virtual Trips with Google Tour Builder

Tour Builder, a free Google tool, that allows users to build virtual trips showcasing text, images, and videos. You choose the information shared and the location displayed at each tour spot.


Suggestions for Use
  • path of a historical event, such as a battle
  • mapping the community
  • places that have changed our community over time (@jenn6416)
  • path taken by a historical figure, such as a tour of important landmarks in Columbus’ journey (@mr_middle_2)
  • locations from a book
  • highlighting math in the world, such as find examples of acute angles in architecture (@mbswoods)
  • various landforms or biomes 
  • create tours to give a geospatial perspective on current events to expand on the roles of GIS in Earth Science (@jcalderitrt)

Examples of Google Tour Builder

Language Arts Focus

Social Studies Focus
Science Focus
Math Focus

Art Focus

Miscellaneous


Fun Formative (and Summative) Assessment Ideas

When someone says the word assessment the majority of educators and students automatically think 'test.' While tests are apart of assessments, it is only a small portion. There are multiple ways that we can assess students understanding that doesn't require multiple choice questions. After all, does multiple choice questions really tell us as educators whether a student truly understandings the content. 

Here are a couple ideas you can use to assess you students that will hopefully engage them more than a paper/pencil exam. 


Mash-up: Online Article + Google Drawing = Blackout Poetry

If you haven't heard of Blackout Poetry, please check out the Austin Kleon website and Newspaper Blackout website. The concept is simple, but loads of fun and I felt empowered after my poetry creation. 

You can preselect the newspaper article or allow students to find an article of their choosing. While I am all about allowing students choice, I would be intrigued to see all of the poems that would come from one piece of published writing. 

Tools you will need:

  • Computer with internet access
  • Newspaper Website (any will do)
  • Screenshot tool (on the computer or Chrome extension, such as Awesome Screenshot)
  • Google Drawing


I wouldn't by any means consider myself a poet, but within 10 minutes I was able to take a screenshot of an article - the first one I came across - put it into Google, and create a poem. It might not be the best, but I am proud of my poem. 


Here is a video that will show you how students can perform this same activity. 


What a fun way to get students engaged in writing and creating masterpieces from someone else's published thoughts. 


Creating 24/7 Learning Experiences for Teachers

My district, Leander ISD, is in process of going 1:1 for all 6th-12th grade students. With the new onset of devices being put into the hands of the students there had to be a push to educate the teachers on digital tools.

With the new rollout, I received the chance to work two days a week at one of our middle schools. My role on campus was to help prepare and train the teachers on digital tools. My problem was that I am only there twice a week. I knew I had to do something different to make sure that the teachers had plenty of learning experiences. I asked myself, how can you reach teachers 24/7 and ensure that they have the resources available regardless of your physical presence. My answer was online self-guided learning experiences


I took the idea to the principal back in November and she was on board. This post is going to show you how I set up the learning opportunities and website. Keep in mind that it is a work in progress. 


"Leveled" Categories
We always talk about how professional development is not differentiated enough for teachers. I knew that I had to do something different because there are teachers of various technology proficiency levels at the school. While I could have done beginning, intermediate, and advanced learning opportunities, I didn't really like the way that it sounded. Being a student who grew up struggling with reading I hate labels, so I didn't want to put those labels on the teachers. Not being technology savvy doesn't mean you are an inadequate teacher, it just means you need more time and practice than others to catch up to the digital times. 

The more I thought about how educators learn new tools the easier it was for me to figure out how I was going to differentiate the learning. I came up with three categories to tag the learning opportunities: self, class, and student. 

Self denotes that the teacher is going to be learning about a new digital tool for their own personal growth. Examples of self experiences would be learning how to use Google Drive, building a practice Google Classroom to get comfortable with the features, using a new tool to curate digital resources, etc. 

Learning opportunities tagged as Class mean that the teacher is learning a new tool while creating something to share with the class (or students). The teacher is the one doing the creating. Examples of class experiences would be creating a Padlet for students to collaborate with one another, creating a custom search engine for students to use during research, creating a video to showcase a concept, etc. 

The last type is Student, where the teacher gives the student the resources needed to create something using a digital tool. Examples of student experiences would be teachers providing differentiated opportunities in Google Classroom, students creating an animated dictionary, podcast, video, e-portfolio, etc. While I don't like labels, I think many will agree that Student is the category we want most teachers to reach. 

Function Categories
Once I had my three types of learning opportunities, I created the different categories you would use to describe digital tools. This led me to the function of the tool and not the actual tool itself. I don't care about the tool. I care about what the tool allows teachers and students to do. Digital tools come and go, but the function will never die. To date, the learning opportunities fall under one or more of these categories. 


Learning Experiences
Now that I had my types and function, it was time to start building the learning experiences. This will always be a work in progress. I am constantly thinking and receiving feedback on new ways to improve. Sometimes I highlight one specific digital tool, while other times I give several options and allow the teachers to choose the one that fits best for them. Again, it comes down to the function of the tool and whether or not there multiple tools that fit that particular function at the moment. 

Here is how I have chosen to structure the learning experiences:


As I mentioned prior, some of the learning opportunities focus on a specific tool and the function that tool provides, while others provide choice in tools to try. As in the example above, Padlet is the tool and the function is communication, collaboration, assessment of/for learning, curation. Here is an example of when I suggested various tools to try.


Once I had several learning opportunities developed it was time to build the website. I chose a Google Sites for a couple options. 

  1. I know Google Sites like the back of my hand.
  2. Awesome Tables scripts works with Google Sites. 
  3. We are a Google for Education district and I wanted to model for the teachers something they could use (awesome table) on their website. 

If you have never heard of or seen Awesome Tables you are in for a treat. I used the 'cards' tool to create the interactive piece on the main page of the website. The teachers could then sort by function or type to choose the learning opportunity they want to focus on at that moment. The cards show the name of the learning experience, the badge they will earn (more about badging in a future blog post), and a summary of the experience. When they click on the experience that interests them, they are taken to the document with all of the information. 

I am not going to lie, this was and is a lot of work. But it is work that I felt was necessary in order to provide the 24/7 learning experiences that the teachers need in order to help create a digital classroom. My next challenge, as I am moving to the Instruction and Professional Learning Department next school year, is how to make this district wide. 


20 YouTube Channels for Educators

YouTube has proven to be a go-to place when you want to learn something new. You can find educational videos on how to round numbers, educational experts giving speeches, how to use Google Classroom, and so much more. 

I recently presented YouTube Can Do That?! at the annual TCEA Conference. One of the participants came up to me afterwards to ask where to find good educational channels. That prompted me to create this list of the educational channels I recommend.


Professional Development on Digital Tools 

Focusing on Google for Education tools
  • Google for Education - official channel of Google for Education
  • Google Chrome official YouTube channel for the Chrome browser, OS, Web Store, and Chromebooks
  • The Gooru - great informational resource to learn about Google for Education tools. 
  • Eric Curts - information and tutorials for educational technology resources centered around Google for Education. 

Teaching Strategies
  • Edutopia - highlights the evidence-based teaching strategies, such as project-based learning, STEAM, response to intervention, tech literacy, etc. 
  • Buck Institute for Education - centered around project based learning (PBL). 

Inspirational Videos
  • Ted-Ed - collection of inspiring videos in animation format
  • TedX - videos from TedX talks around the globe
  • Big Think - showcasing videos from educational experts
  • Infinite Thinkingengaging Internet TV show for educators to inspire creativity and innovation

Content Specific
  • Amoeba Sisters - videos focusing on explaining difficult science concepts through animation and humor. 
  • Khan Academy - content based teaching videos
  • Discovery Educationstories and experiences from the world of science, natural history, anthropology, survival, geography, and engineering.
  • National Geographic - videos featuring stories on natural history, wildlife, and so much more
  • SciShowexplores the unexpected of science
  • Mathantics - fun videos centered around math concepts
  • Educator - instructional videos in math & science 


Mash-Up: New Google Forms + Flubaroo = Grading Time Saver

There are several Google Form and Flubaroo videos out there, but I couldn't find one showcasing the new Google Forms with the last updates to Flubaroo. I created a couple tutorials, one with the new forms look and one with the old forms look. Both videos highlight the grading by hand feature in Flubaroo.  

New Google Forms + Flubaroo updates video:


'Old' Google Forms = Flubaroo Updates:


If you want to use Flubaroo with multiple classes, you will need to make sure that you make a copy of the Google Forms assessment for each of your classes. This will keep the students grades on separate spreadsheets. 

If you want to learn more about the new Google Forms, check out my tutorial here


Google Drive: Set Date/Time to Auto Expire for Shared File/Folder

One of the best features of Google Drive is the ability to communicate and collaborate with other people. When you share files and folders with other people, you must manually take those permissions away. Sometimes you want to be able to share with other people for just a short period of time. The auto expire script keeps you on top of things and does the work for you. 

Steps to activate the script:

Step 1: Click on this link to access the script (it will automatically make a copy for you).


Step 2: In line #3, replace the existing URL with the URL of your shared Drive file or folder.

Step 3: In line #7, replace the existing date and time with the date and time you want the file/folder to automatically remove permissions. Note, the time must be according to the 24 hour clock, i.e. 3:00pm would be 15:00.


Step 4: Click on File, select 'Project Properties,' and choose your time zone.


Step 5: Click on Run, select start, and authorize to run. 


Close the script editor window, sit back, and relax because the script will do all the work for you. 


Newest Features in Screencastify

Screencastify is one of my go-to tools for screen recording because it is so easy to use and uploads to Google Drive or YouTube automatically. The free version allows you to record video up to ten minutes. 


The extension recently had an update that now allows the recorder to highlight important areas on the screen with a mouse pointer or pen feature. Here is a quick video that will show you the latest updates. 


If your Screencastify hasn't made the update you can right click on the Chrome extension, remove from Chrome and then re-add in from the web store. 

The new tab tools (mouse pointer and pen) work on the majority of websites. If you start recording and the tools don't appear you know you have found one of those websites where the tools are not enabled. 


Create a Custom Search Engine for Your Students

As more and more classrooms are moving in the digital age, teachers are encouraging students to conduct research online. After all textbooks are becoming outdated the minute they are printed. While the internet is great for finding answers it can also be a daunting experience for students.  Custom Search Engine is the perfect way for teachers to control which websites the students are directed to when conducting a search. 

Custom Search Engine should not be used for everything, as teaching students how to decipher the online world of information is important. With that said, there are times when you want to guide students into a more focused search. 

Below will show you how to create a custom search engine in five easy steps.

Step 1: Open the Custom Search Engine website. 

Step 2: Enter sites students can pull information from
 Step 3: Name the search
Step 4: Click Create

Step 5: Get the public URL and share with students

Here is what students see when they click on the teacher's custom search link:


Use Crafty Text Extension to Project Text Bigger

Crafty Text Chrome Extension makes text appear bigger in the center of your screen. It works on top of any website. 

Click on the Crafty Text extension, enter text into pop-up, hit enter, and voilà


Need to project a shortened URL? Use the goo.gl Chrome Extension to create the URL and then paste the address into Crafty Text. Now everyone can see it!


15 Integration Ideas for Teaching with Maps

Last Tuesday's #gafechat discussion I posed various scenario questions. One of the questions pertained to students learning about various locations in the world via maps. 


Here are the technology integration ideas that stemmed from our discussion. 

Have the students...

  1. use Periscope to see the world through the eyes of someone else. (@AlexaSchlechter)
  2. use My Maps to build collaborative maps with placemarks, video and images. (@alicebarr@THLibrariZenShakeUpLearningLISDTechie)
  3. show the different locations with streets, buildings, etc. via Google Earth.(@MLunoff)
  4. take a screenshot of the map using Awesome Screenshot Minus and annotate/add text. (@SPFTech_Treglia)
  5. build a tour around the world using Google's TourBuilder, so they can add text, images, videos and more. (@jcalvert4@LISDTechie)
  6. add maps to a Google Drawing or Google Slides and collaboratively add information about the location. (@MLunoff)
  7. build a map using Google Maps and a Fusion Table. (@VCSataylor)
  8. explore the locations via Google Maps/Earth street level. (kilgoretech)
  9. find locations via a scavenger hunt on Google Maps that ties to political and cultural geography. (@MattHarrisEdD)
  10. use Screencastify to record a video explaining how they used websites to identify the locations. (@MLunoff)
  11. identify locations via GeoGuessr, a game that requires you to guess a particular location based on street view. (@bluebutterflysm@MathDenisNJ )
  12. create an interactive map using batchgeo.com and Google Forms. (@kilgoretech)
  13. label a map using Thinglink - a tool that allows you to add text, videos, images and more. (@curryhj2000@AlexaSchlechter
  14. use Google Cardboard to experience locations around the world. (@LISDTechie)
  15. use Scribble Maps to build an interactive map. (@LISDTechie)


Here are some addition resources to help with your integration:
Around the World in 60 Minutes by Michelle Armstrong


Great Websites to Find Royalty Free/Creative Common Images

Many people forget that using someone else's image can violate copyright law. Here are some websites teachers and students can use to ensure they aren't breaking the law. 

Google Images
When finding an image on Google, it is important to change the usage rights to ensure the image is free to use. 


If you plan on changing the image in any way make sure to select one of the 'with modification' options. 


Pixabay
This site has nice royalty free images and you can log in with your Google account. 

Pics for Learning
Find safe photos to use in class with no login required. You also have the option to save the image to your Drive.

Photos for Class
This site has safe G rated images from the the makes of Storyboard That. There is no login required to download the images. 

Check out my page for more websites with creative commons photos. Happy image hunting!


Favorite Chrome Extensions - Week of May 25th

I started my journey of blogging about my favorite Chrome extensions back in August 2014. Each week for the past nine months I have blogged about four extensions that I felt teachers and students should know about. While I have enjoyed my journey of discovering and sharing all these wonderful resources, I feel it is time for this journey to come to an end. While I will continue to blog about Chrome extensions periodically, this will be my last official 'Favorite Chrome Extensions of the Week' post. 

With that being said, I hope you have found these posts beneficial. People say that you always keep the best for last and I truly feel that this post might be the best. The first three extensions showcased below can be game-changers in the classroom. Enjoy!!!

#1: Google Tone
Type: Accessibility
Summary: This is a new Chrome extension that will transform the way that teachers share online resources with students. The extension is similar to the app Chirp in that it allows someone to transmit a URL to other people via sound. All parties must have the extension downloaded and enabled for it to work. When you want to share a URL, simply click the extension icon and every computer within earshot will receive a popup with a link to the URL. 

#2: DocentEDU
Type: Social & Communication
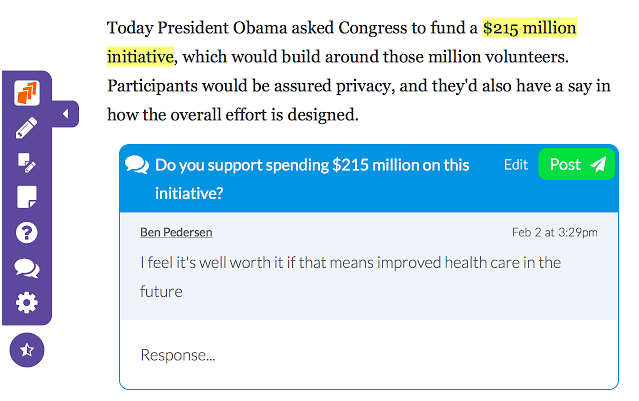
Summary: This extension allows you to easily highlight text, add comments, embed videos, and add discussion to an online website. Assign the websites with the added resources to students. This extension is great for adding to already existing information. Teachers can create all inclusive lessons with this extension. 


#3: Appear.in
Type: Social & Communication
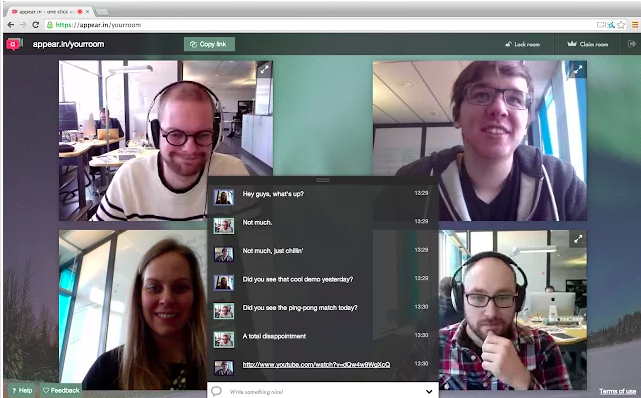
Summary: I just recently learned about this website/extension and I see so many possibilities. Appear.in lets you start a video conversation with anyone right in the browser, without the need to download and install anything, or register an account. Invite up to 8 people to a video conversation just by sending them a link. You can claim a 'room,' which means that you have that URL to use whenever you need. You can share your screen with the viewers which is great for demonstrations or tutorials.


#4: Silver Bird
Type: Social & Communication
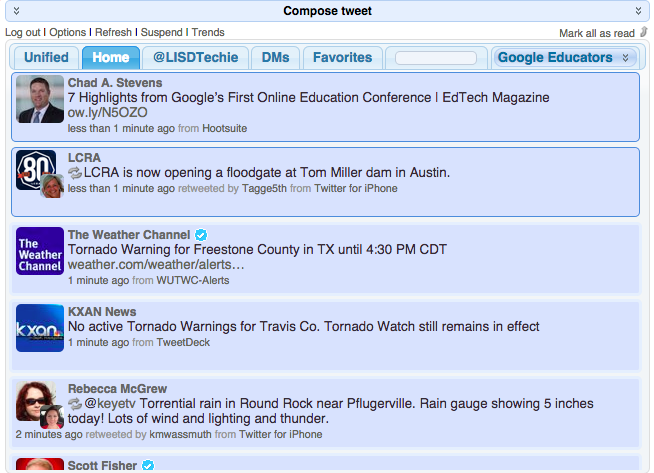
Summary: This extension allows you to interact with your Twitter feed from any open tab/window. You can check your home feed, your mentions, direct messages, favorites, particular feeds from your lists, and compose a tweet. Great extension for anyone who uses Twitter. 


It has been a great journey showcasing my favorite Chrome extensions. Look for other recommendations in the future. 


Mash-Up: Google Slides + Photos to Create Master Slides

As the end of the year approaches there are more and more research projects being done in the classrooms. Here is a quick tutorial to show you how you can manipulate the master slides in order to create beautiful presentations. 


Click out my Stock Photos page to find additional websites with copyright friendly photos. 


Favorite Chrome Extensions - Week of May 4th

Here are my picks for the week. Hope you find a Chrome extension you will come to love. 

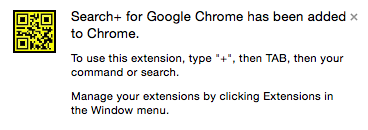
#1: Search+ for Google Chrome
Type: Productivity
Summary: Instantly search Google+ from the omnibar. 


#2: Chrontabs
Type: Productivity 
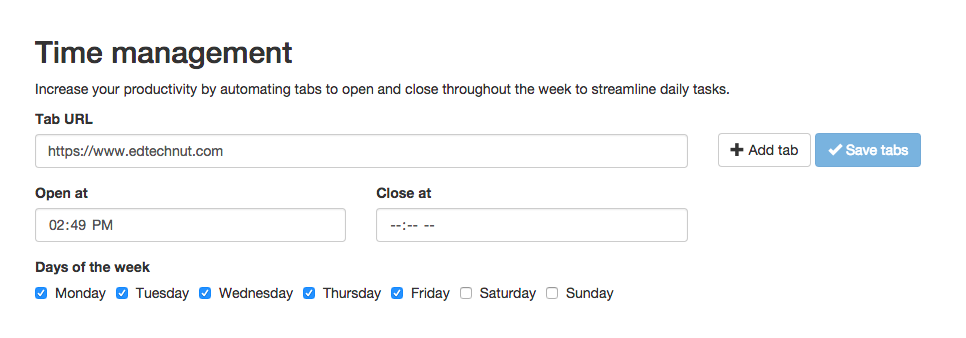
Summary: This tab can help you stay on top of tasks that you need to complete on a daily or weekly basis. Set websites to open (and close) at specific times of the day. 


#3: Tab-Snap
Type: Productivity
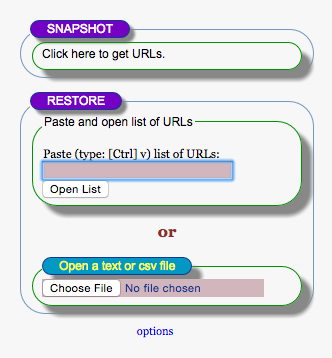
Summary: Create a list of all the open tabs. While you can restore a list of URLs you have to come across that list to open all of the tabs at once. I see this more for teachers being able to copy a list of all of the URLs to share with students. Or the students can then copy that list and paste it into the restore to have all of the tabs opened up at once. 


#4: Search Preview
Type: Search Tools
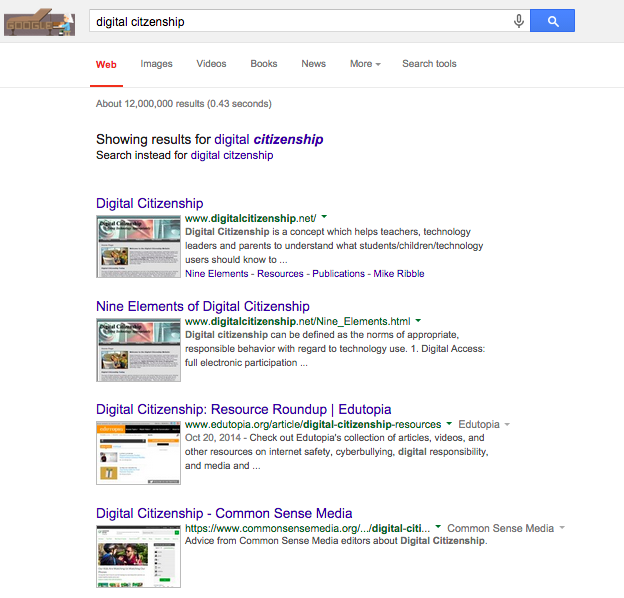
SummaryEnhances your search pages by inserting preview images and related links to the sites that appear. This feature is supported in Google, DuckDuckGo, Yahoo and Bing.


Favorite Chrome Extensions - Week of April 13th

Here are my Chrome extensions for the week. 

#1: One Click Google Hangout

Type: Social & Communication
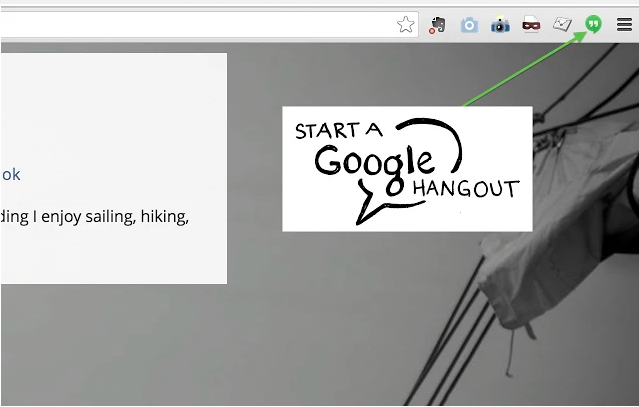
Summary: I love this extension. You can instantly create a Google Hangout simply by clicking the extension icon. The Google Hangout window pops up, while instantly copying the link to the hangout on your clipboard, so you can quickly share. Keep in mind it this works for a regular Hangout, not a Hangout on Air.


#2: Quickmarks
Type: Productivity
Summary: If you are someone who bookmarks a lot of sites on your bookmark bar then this is a must have. Once installed, type 'b + tab' in the omnibar, type in the name of your bookmark, hit enter and it will immediately open. 


#3: TimeStats

Type: Productivity
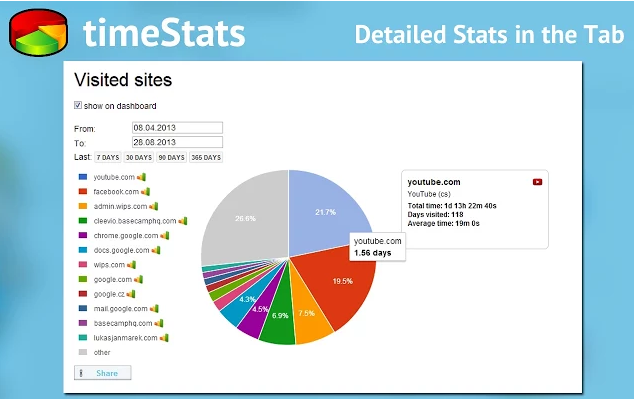
Summary: This extension gives you a breakdown of the sites you visit daily, monthly, and more visited. It gives you the amount of time spent at each site, complete list of the domains from most to least visited, the days you spend the largest amount of time, and more. You can place the sites into categories to help you track the type of sites you spend most of your time. 


#4: Calculator
Type: Productivity
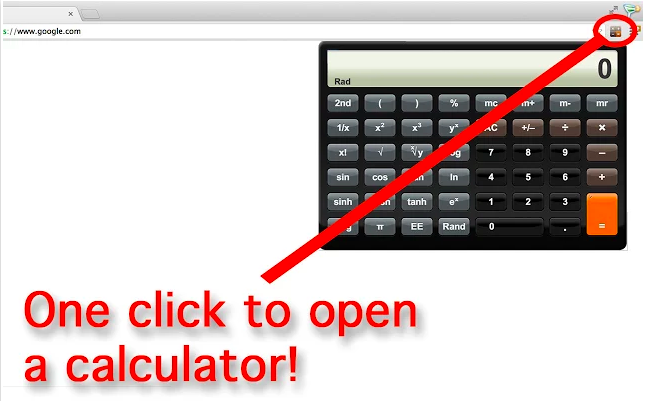
Summary: This is a scientific calculator that will open up in the tab/window you are in. Sure you can open the calculator in Google, but this takes you away from the page that you are on. There is nothing magical about this extension, it won't do the math steps for you, but it will allow you to quickly compute the answer. Some people think that calculators should be kept from students. I disagree. I think that students should use calculators when they are practicing problems to help them see if their answer is correct. It won't do the steps for the student and in no way should it replace the students working through the problem. It is just a way for students compare their answer to the calculators answer. 


Did you learn any new extensions that you are looking forward to using?