Showing posts with label students. Show all posts

Mash-Up: Keep + Docs = Instant Photo Transfer

One of the latest updates to Google documents is that you can now bring in your notes and lists from Google Keep. The part that has me the most excited is the ability to take a picture on your phone or tablet and instantly add it to a document, without having to upload it Drive first.  

For years, I have been taking pictures, especially during conferences, and uploading them to Drive in order to insert it into a document. This had been my number one way of taking notes during sessions. Inevitably, I miss something the presenter is saying or miss the opportunity to take another picture because am focused on the upload process. In addition, all of these pictures are taking up space on my phone, until I take the time to go delete them. 

With Google Keep, my life and phone storage just got a whole lot happier. In the Keep app, you can take a picture using your device and now it instantly will appear in the Keep sidebar of your Google document. Drag and drop the picture onto the document, and any title or note you included in Keep with be included on the document, with editing ability. Plus, these photos are stored in keep and not in your camera roll. #spacesaver 


In the Google Keep app:


In Google documents:


What a great way for students to quickly add images to their stories, to the notes they are taking, or lab reports they are composing. There are a ton of possibilities with this new update. Thanks Google!


Adding Audio Files to Google Classroom

There are a couple options for adding audio files to your Google Classroom and having students access that audio file. You can add an audio file that you have already placed into your Drive or you can attach an audio file from your computer. You can create audio files using Vocaroo. Check out my tutorial on this tool. 

Some ways for teachers to use audio files in class:

  • oral administration of assignment
  • read a story
  • audio version of notes
  • recorded lesson
  • famous speeches


Students can also record their own audio file and upload and turn it in via Google Classroom. 

If you need extra assistance with Google Classroom, please check out my resource that shows both the teacher and student view. 

Creating Study Sets with Quizlet

Quizlet is a free website that allows the user to create study sets. Teachers and students can both create study sets. Teachers can push the sets out to the students via Quizlet, Google Classroom, link, or embed code. You can add images and audio. 

No time to create a study set, not worries you can find and use other people's. You can also have a student create the study set for you to push it out to the class. 

Here is a quick tutorial on Quizlet:


A nice feature, that I failed to highlight in the video, that it will play the term and definition for the students. You don't have to do the recording, it automatically does text to speech for you. 


Great Websites to Find Royalty Free/Creative Common Images

Many people forget that using someone else's image can violate copyright law. Here are some websites teachers and students can use to ensure they aren't breaking the law. 

Google Images
When finding an image on Google, it is important to change the usage rights to ensure the image is free to use. 


If you plan on changing the image in any way make sure to select one of the 'with modification' options. 


Pixabay
This site has nice royalty free images and you can log in with your Google account. 

Pics for Learning
Find safe photos to use in class with no login required. You also have the option to save the image to your Drive.

Photos for Class
This site has safe G rated images from the the makes of Storyboard That. There is no login required to download the images. 

Check out my page for more websites with creative commons photos. Happy image hunting!


Video Production with Students - Helpful Tips and Resources

Here are some takeaways from the April 21st  #gafechat discussion on Using Google Tools to Produce Videos. There were so many amazing tweets and ideas being shared. 

Benefit of Students Producing Videos

What to Consider When Producing Videos:

Examples of Videos Students Can Create & Possible Tools Needed 
  • Screen Capture for Tutorials/Demonstrate Understanding 
  • Stop Motion (example)
    • Stop motion camera
    • Google Slides and screen capture 
  • Argument Videos (thanks @MrSchoenbart for the example) 
    • Camera (mobile device, webcam, video camera, etc.)
    • Green screen app or green sheet
    • Editing software/website
  • Silent Films (thanks @Mizgibson for the examples)
    • Camera (mobile device, webcam, video camera, etc.)
    • GIF creator (Snagit)
  • Informational/Talk Show (thanks @Flems_English for the example) 
    • Camera (mobile device, webcam, video camera, etc.)
    • Editing software/website


Stages of Video Production & Helpful Resources 

Here are some of the stages that students will need to go through to produce a video. Depending on the type of video determines whether or not they need to complete each stage. 

Brainstorming
The brainstorming part if crucial for students to be able to determine what type of film to produce. Tools students can use to brainstorm:


Scripting/Storyboarding
Students work on the writing process when creating a script. Pre-writing, drafts, revisions and collaboration are a huge portion of writing a script. Tools students can use to write a script:


Filming
Here is where students demonstrate their learning. You will be amazed at how engaged and focused a student can be when trying to capture the right shots. Tools students can use to film:

Editing
This requires students to think through a process from start to finish. Tools students can use to edit:

Sharing
Students need to know that their work matters. It is also a great way for the students to gain feedback and then reflect on how they can improve for the next video. Ways students can share their work:
  • Social Network: Twitter, Facebook, Google+, YouTube
  • Use videos in place marks in maps (thanks @alicebarr)
  • Create QR codes to place around the school
  • Upload into Google Drive and share link with parents, teachers, students, etc.

Here are a couple additional resources teachers can use with students to help through the production process:


Google Translate App: Not Just for Foreign Language Classes

I was honored to be invited as a guest contributor on Friday's Google User Group Hangout Meeting with Eric Curts to talk about the Google Apps for Education Twitter chat that I recently started (#gafechat). The Google User Group is a monthly Hangout on Air that showcases the latest updates that Google has put out in the past month. 

During this meeting I learned about Google's latest update to the Google Translator mobile iOS and Android app. The app can now listen for two languages at a time and translate written text using the camera. Although this is not a new feature, I have to mention that the app does speak the word/phrase as well as show the written text. 

I am going to highlight how to use the app in the context of real classroom examples. Before I do let me start by saying, I know that there is no such thing as a perfect translation tool. I am not suggesting that you go out and write a book in another language using this app. I do however think this is a great tool to be used in an informal setting.

Example 1: Parent/Teacher conferences where no common language is spoken
I used to teach in an area where Spanish was the dominant language spoken by parents. Unfortunately, Spanish is not a strong suit for me and so there was a language barrier. I know I was not alone in this struggle. Using the microphone feature of the app can help eliminate that "uncomfortableness" for both the parents and teacher. There are 90 languages available to choose from and the app will listen for both languages selected so no need to switch back and forth. 

Here are some additional examples of how to use this feature:
  1. Between a student new to the country and teacher/student who doesn't speak the student's language.
  2. A student who is practicing communicating in a foreign language. 
  3. A student who wants to practice pronunciations of certain words or phrases. 


Example 2: A student new to the country can use it to help understand the environment around them.

Speaking a foreign language is one thing, but understanding it in written form is another. A new feature of this app is the ability use the camera to instantly translate signs and text. This is feature is available for English, French, German, Italian, Portuguese, Russian Spanish.

Here are some additional examples of how to use this feature:
  1. Teacher can put signs around the room and students can check for understanding.
  2. Students can use it to help them study.


Example 3: Students can practice writing in a foreign language.
The text feature is nothing new, but definitely worth mentioning. This is a great way for students to be able to practice writing in a foreign language and getting instant feedback.

Here are some additional examples of how to use this feature:
  1. Teacher can communicate with a student who doesn't speak the language well.
  2. Students can use it as a "texting" platform to practice having a non-verbal conversation.

Again, I am not showcasing this app as a perfect translation tool. But when there is a barrier between two people because of language, this tool can help bring that barrier down. Plus I am finding it so much fun to "play" with.


Favorite Chrome Extension of the Week - December 1st

This week's focus is on using Chrome extensions to help you research on the web. These are great extensions for teachers and students.

#1: Tab Resize
Type: Productivity
Summary: This extension is similar to Tab Scissors and Tab Glue, but on steroids. It allows you to choose an already existing layout, create your own, undo, and add blank tabs to the layout. I do believe this is my new go to extension when I want to create a new tab layout. It even supports multiple monitors, which makes be every happy. Here is a YouTube video showing how it works.


#2: Highlight to Search
Type: Search Tools
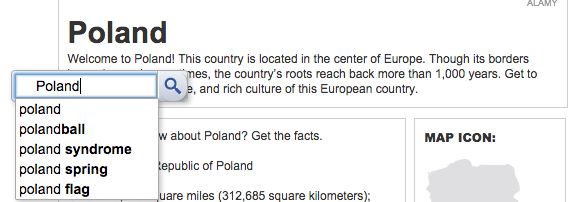
Summary: This makes searching on the web easy. Simply highlight text from an article on the web and a search icon will appear. It will even show you recommendations from the highlighted text. 


#3: Search All
Type: Search Tools
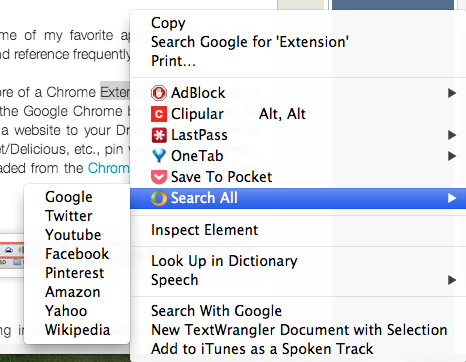
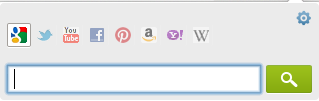
Summary: Quickly and easily find information from multiple search engines with this extension. Highlight the text you want to search, right click and choose the search engine from the available list. If you want to start a new search, click the extension and a pop-up will appear. Simply type in your terms and choose the search engine.


#4: Clearly
Type: Productivity
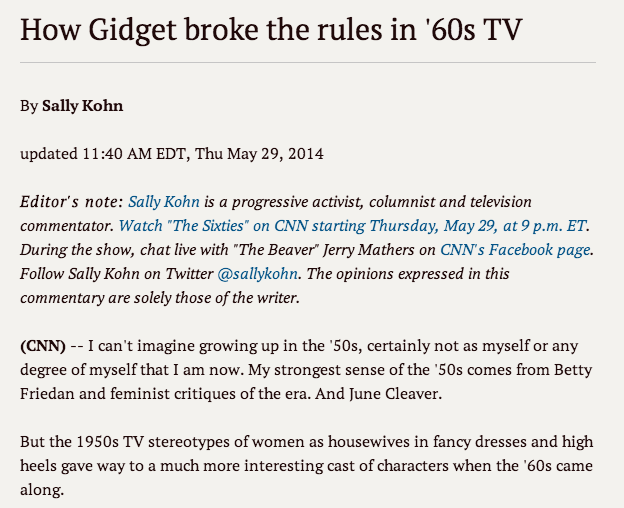
Summary: Strip extraneous images and distractions on webpages to make a  "clear" set of text to read. Highlight text, send the clip to Evernote account.


Before

After


Get Student Feedback Using Geddit

I just discovered Geddit and am in love. This is an awesome assessment for learning tool. 


Here is why Geddit is so awesome!

Student Accounts
Student have the ability to sign in with a Google account or create an account. Students do NOT need an email address to create an account. They can give a username instead. 

Once they have logged in to Geddit, the teacher will give the students a code to join his/her class.

Students Can Check-in
Geddit allows students to "check-in" with the teacher to let them know how they are feeling about the lesson. The teacher is the only person who can see the students' response, so they can answer without fear of judgement. Here are the students' choices:

  • I don't understand this :(
  • I think I get it?
  • I'm OK with this
  • I've got this
  • Easy, I could teach my friend

Teachers Can Push Out Questions
Teachers can create separate lessons filled with questions to ask students. The teacher then pushes out each question to all the students at the right time. Teachers have the ability to create standard questions (multiple choice, short answer, long answer, or poll) or a math question. 

There is even the ability to ask a question on the fly, by creating a quick question. For the quick question the students will see A-D for multiple choice, T/F for true and false, box for short answer and A-D for a poll. Verbally give the students the question and answer choices and push out a quick question. 

If your classroom is not 1:1, that is okay. Ask questions where students have to answer in a group.

Show Students Class Data
Teachers have the ability to share with students how the class as a whole answered a question. It will not show the students individual answers. Teachers can use this to have class discussions on why some students might have answered a particular way. 

Student Data
Teachers can pull up individual students to see how they answered all of the questions, as well as send them a private message that will show up only on their screen. This is a great way to redirect a student without embarrassing them or give a student encouragement when you see they are frustrated. 

Share Lessons with Other Teachers
After the lesson ends the teacher can export the data to see how all students performed and get a whole class picture. You can also share your lessons with your colleagues, so they do not have to reinvent the wheel. No student data will be transferred when you share a lesson. 


If you haven't tried Geddit, I highly recommend you check it out. 

Google Classroom Helpful Tips and Integration Ideas

I am so excited that Google Classroom is starting to take off in my district. It is such an easy tool to use and it's free! Who does not love free tools!

I get questions about Classroom almost on a daily basis. I have compiled some helpful tips and integration ideas in this Google presentation. I will add more tips and ideas as they surface. Some of the ideas are my own (not that anyone else hasn't thought of it) and some I have gotten from other people (which is noted). 

Here are a few things included:

  • Using a capacity matrix to guide students
  • Numbering assignments
  • Grading with zero or one
  • Class discussion ideas
  • Sharing resources
  • And more...
Hope you enjoy!


Quick Google Sites Tip for Teachers

Yesterday, I got the pleasure of working with teachers on Google at one of our middle schools. We all know that teachers have a million things on their plate and they don't have enough time to get everything accomplished. I shared a little Google Sites tip with them that they seemed very thankful for. 

If you want to share a group of files with your students, place all of the files in a shared Google Drive folder. Insert that Drive Folder onto your Google Site page. Now every time you drop something into that shared folder it automatically appears (upon browser refreshing, of course) on the page with the inserted folder. 

There is no need for placing the file in the shared folder and then going to your Google Site to insert a link or attach the file. Why take 2 steps when you can do it in one! Something so simple can end up saving a teacher a lot of time in the long run. Share the tip with your friends and co-workers. 


Here are directions for inserting the Drive folder. 


10 Ways to Add A Google Calendar Event

One thing I absolutely love about Google Calendar is all the different ways you can add an event. I don't think Google could make it any easier. 

Here is a presentation that I put together on 10 Ways to Add a Google Calendar Event. Feel free to share with others.  
http://goo.gl/DwCHoa